This document provides instructions for navigating and managing the ACU System Manager/Web Server interface.
The ACU System Manager is a centralized web-based interface designed to manage robotic services, AI integration, and environmental path planning. It provides a robust suite of tools for monitoring real-time application status, configuring hardware-accelerated AI models, and managing complex path-planning projects generated via YNX Robot Simulator. With a secure, role-based access system for users, developers, and administrators, the platform serves as the primary hub for orchestrating the interaction between robotic hardware and software services.
Integrated monitoring of system resource and detailed real-time logging offer insights into application health and performance. Comprehensive global settings allow for sophisticated network configurations, alongside critical maintenance utilities such as USB-based data backup/restore and automated version updating, ensuring a stable and transparent system in production environments.
¶ 1. Accessing the System
The ACU Web Server provides a centralized interface for managing robotic services, AI models, and environmental path planning. To access the web service, navigate to the server IP address in your web browser.
By default the address is https://192.168.1.253:80
¶ 1.1 Logging In
- Enter your User name and Password into the provided fields.
Below are the default user accounts and passwords
| User | Password | Role | Description |
|---|---|---|---|
user |
puser |
User | Basic readonly user |
developer |
pdeveloper |
Developer | Access to upload and manage services |
admin |
padmin |
Administrator | System administrator, manages all settings |
- Click the login button to enter the dashboard.
- Language Selection: Before logging in, you can change the interface language using the Language button in the top right corner.
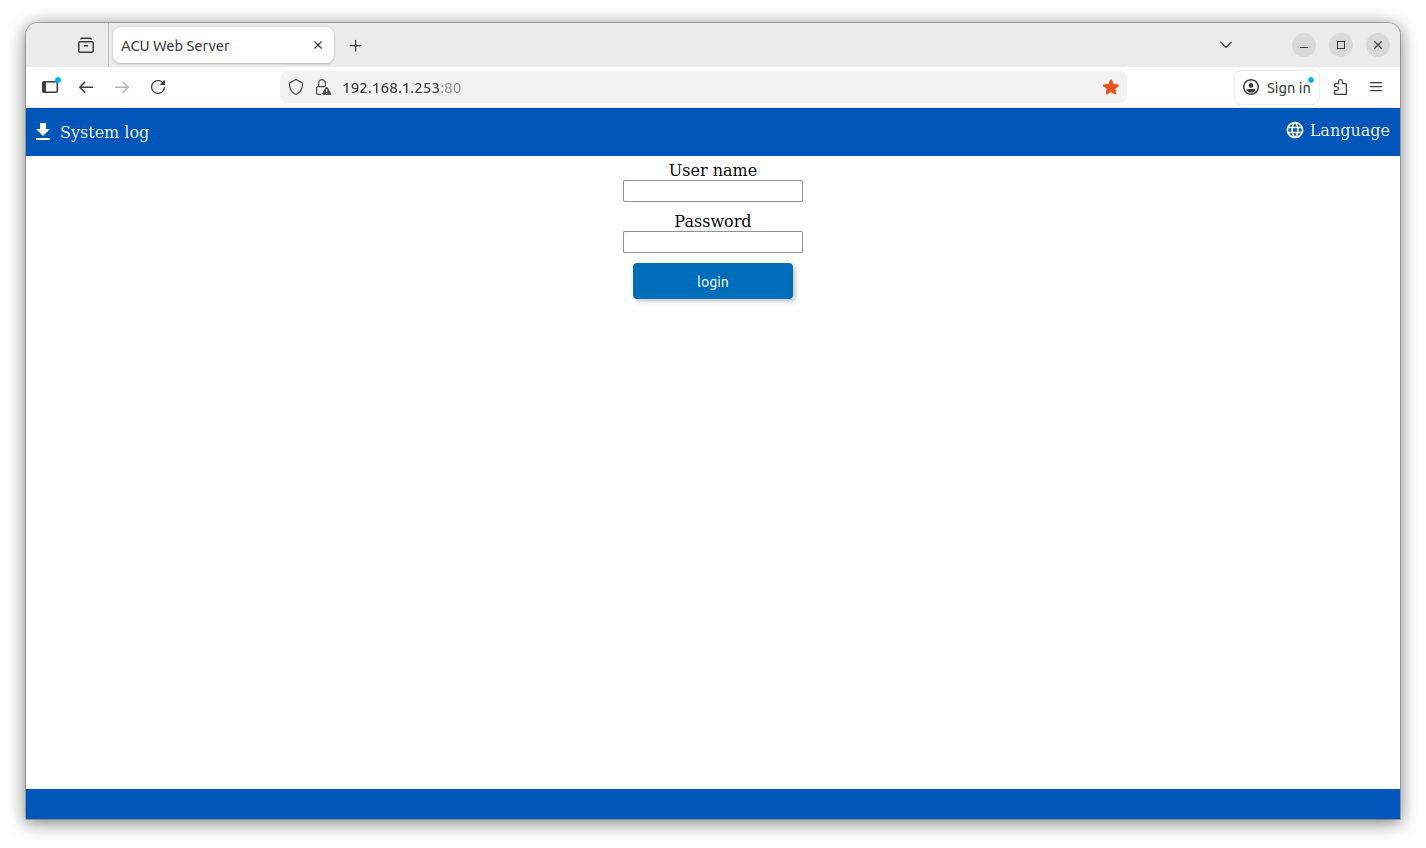
Figure 1.1: Authentication Portal
¶ 2. Interface Overview
Once logged in, the interface is divided into a Sidebar Navigation (left) and a Main Content Area (center).
¶ 2.1 Navigation Sidebar
Use the sidebar to switch between different modules of the system:
- Application: Manage software services and system apps.
- Skills / Path Planning / AI Model: Configure specific robotic functions.
- File Explorer: Manage local server files.
- Log: View system activity and error reports.
- Settings: Access global system configurations.
- Logout: Securely exit the web server.
¶ 2.2 Header Tools
- Notifications: The bell icon displays a red badge when the system requires attention.
- Language Settings: Change the display language at any time by selecting the Language globe icon.
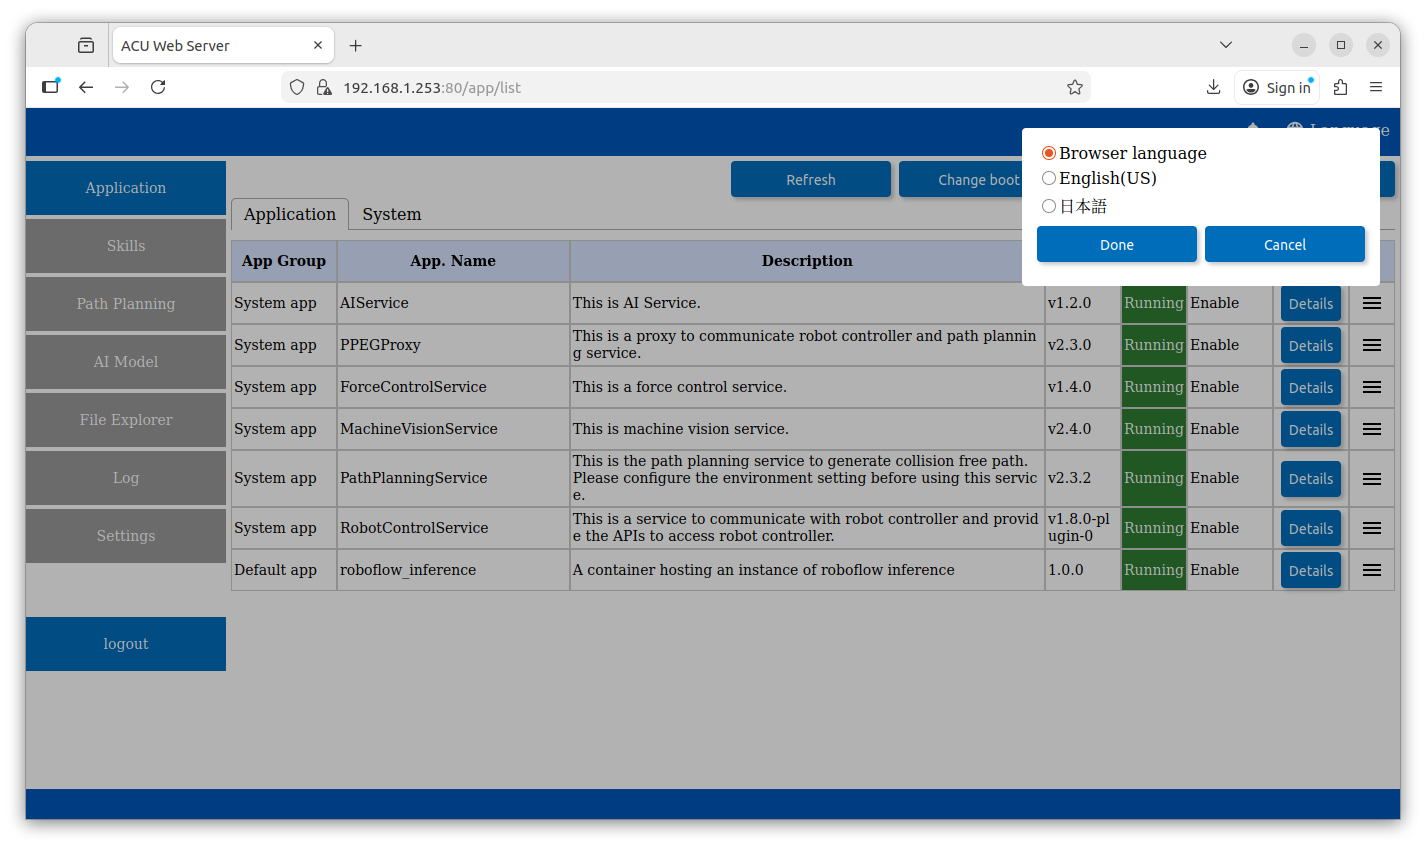
Figure 2.2: Changing System Language
¶ 3. Managing Applications
The Application tab is the primary area for monitoring and controlling your robot's software services.
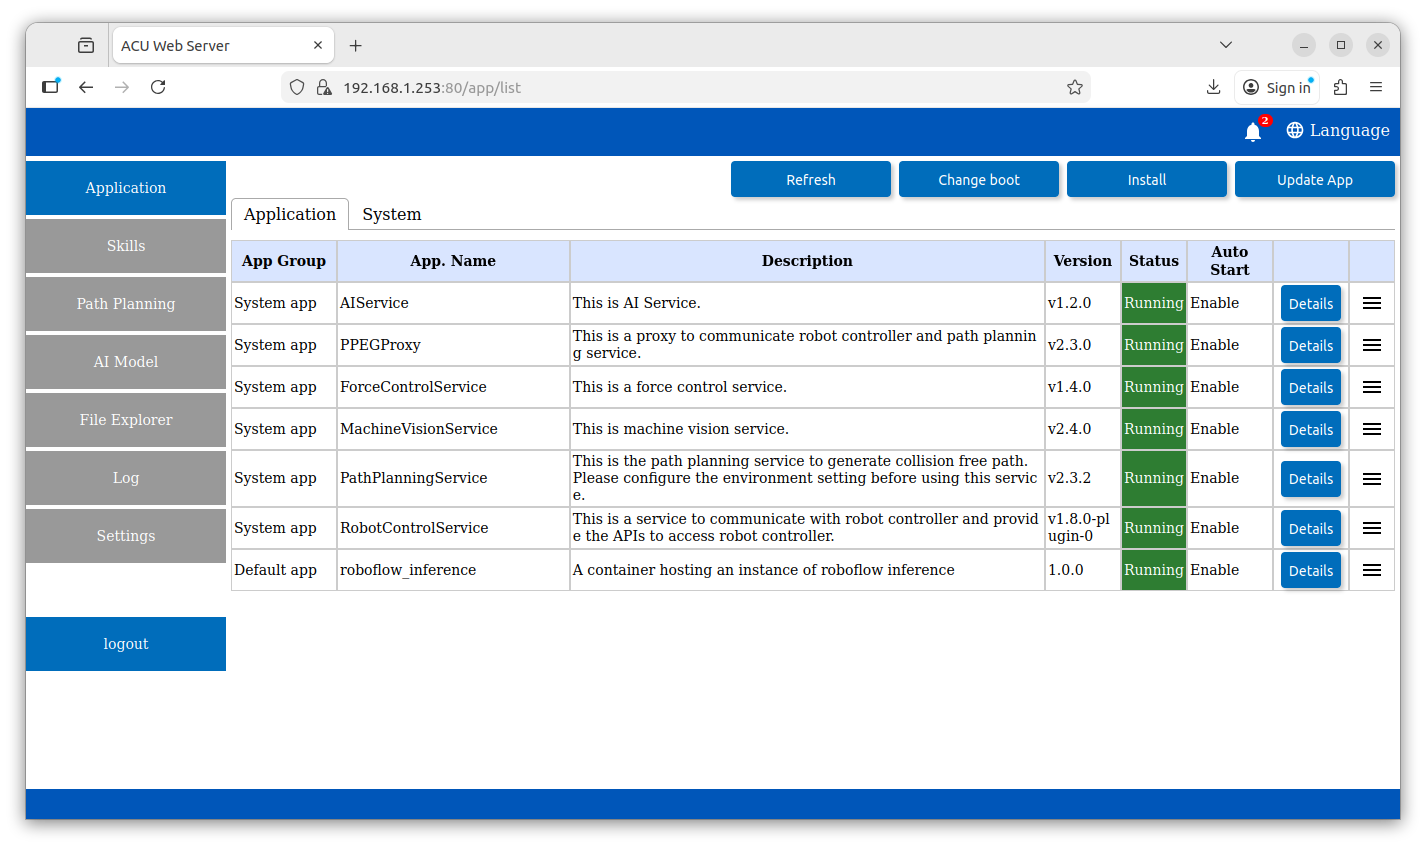
Figure 3.1: Applications Page
¶ 3.1 Viewing Application Status
The main table displays the current state of all installed applications:
- Status: A green Running label indicates the service is active.
- Auto Start: Indicates if the app will launch automatically when the ACU boots.
¶ 3.2 Application Controls
Click the hamburger menu (☰) on the far right of any application row to access power controls:
- Start/Stop App: Manually toggle the service.
- Restart App: Refresh the service without a full system reboot.
- Clean restart App: Re-initialize the app from a clean state.
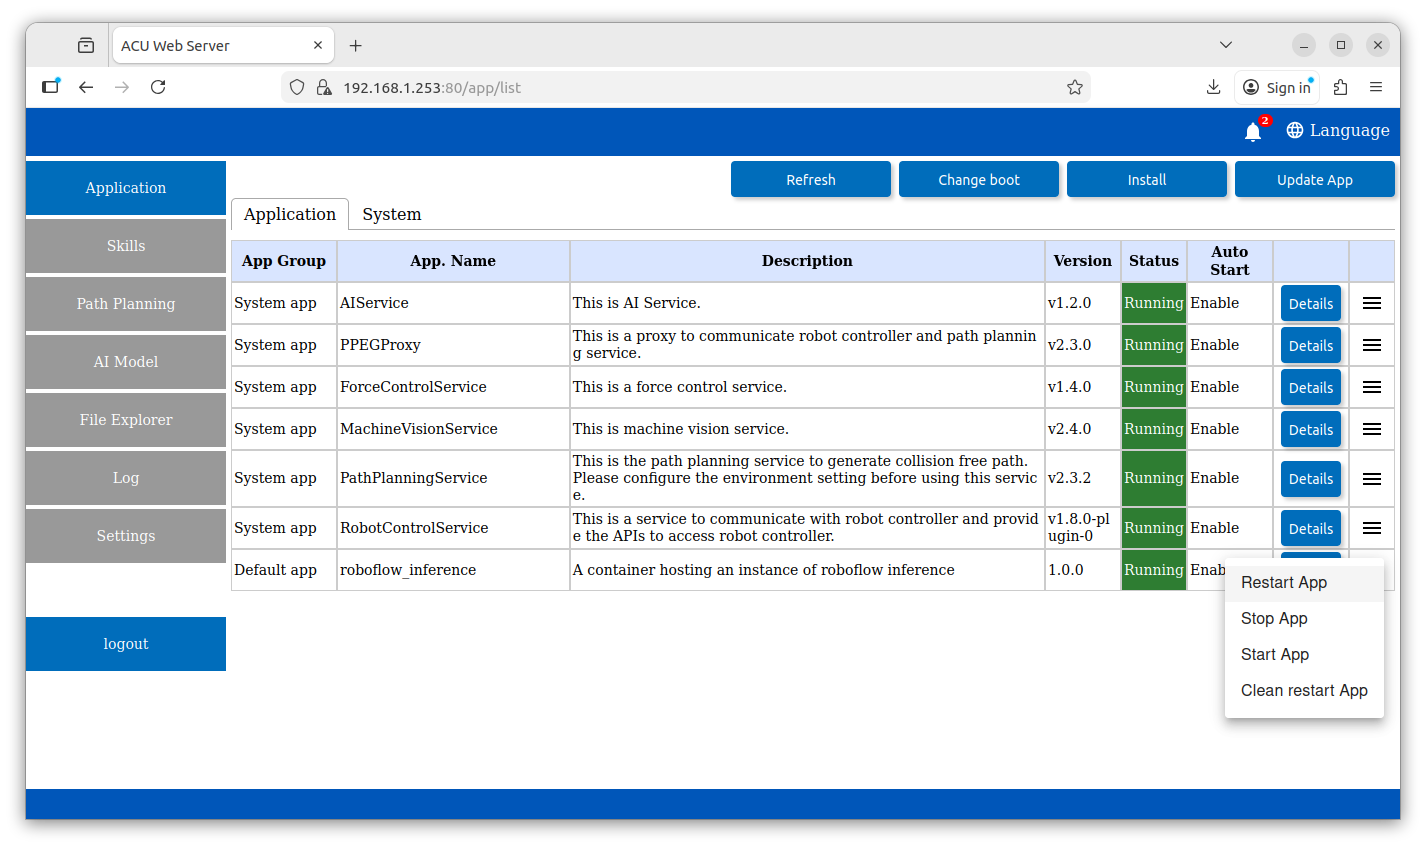
Figure 3.1: Application Context Menu
¶ 3.3 System Services
Switch to the System tab to view core background processes. Note that these are critical for server operation and typically do not have manual toggle controls.
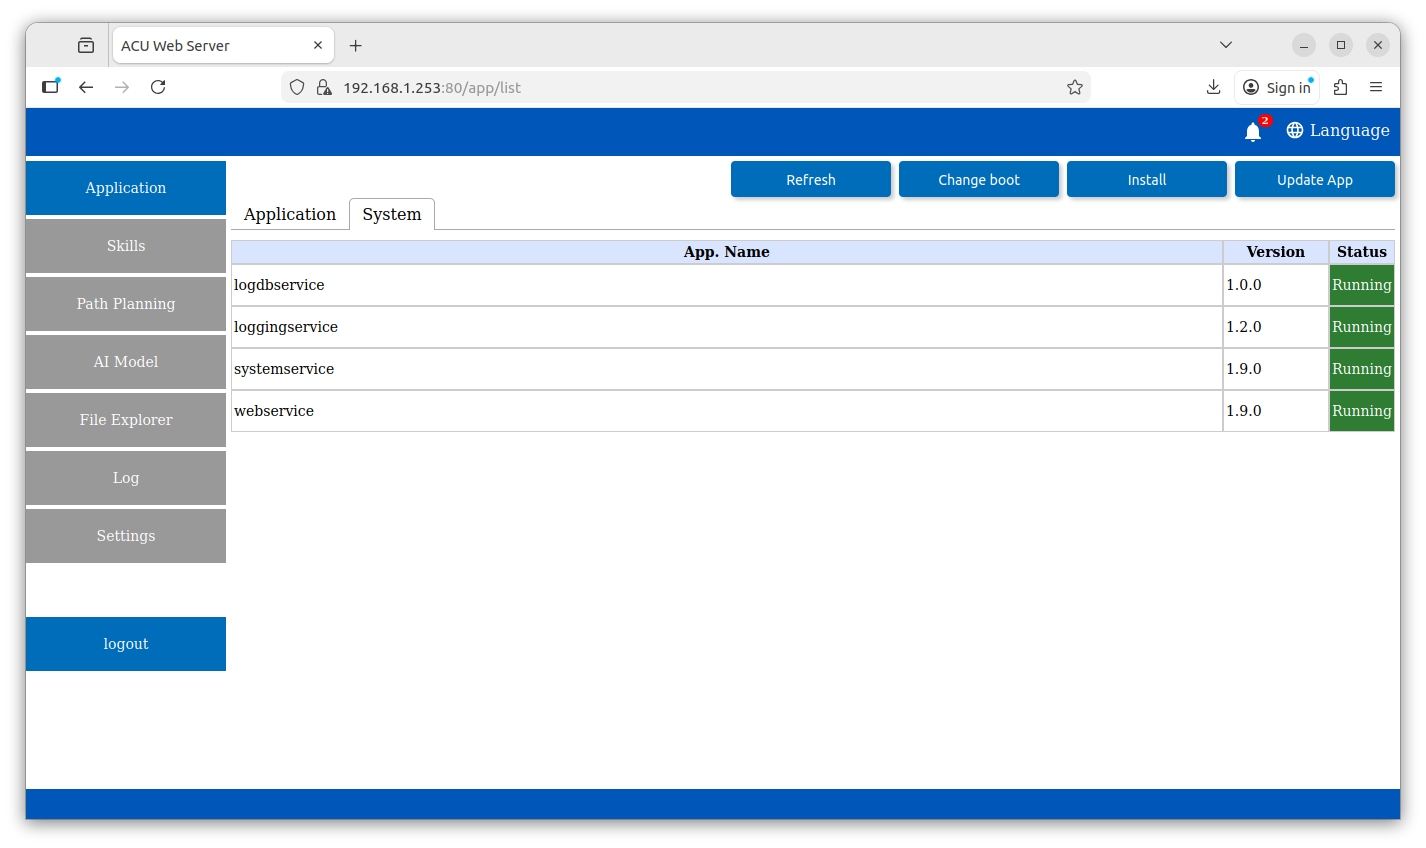
Figure 3.2: System Services Tab
¶ 3.4 Configuring Application Details
To view or modify specific settings for an application, click the Details button in the application list. Within the Details view, you can:
- Review Metadata: View the Developer, Version, and Installation Date.
- Hardware Usage: Check if the app is configured to use specialized hardware like GPUs.
- Toggle Auto Start: Use the green switch to enable or disable automatic launching.
- Uninstall: Permanently remove the application from the server.
Note: Always click Save Settings after making changes to ensure they are applied.
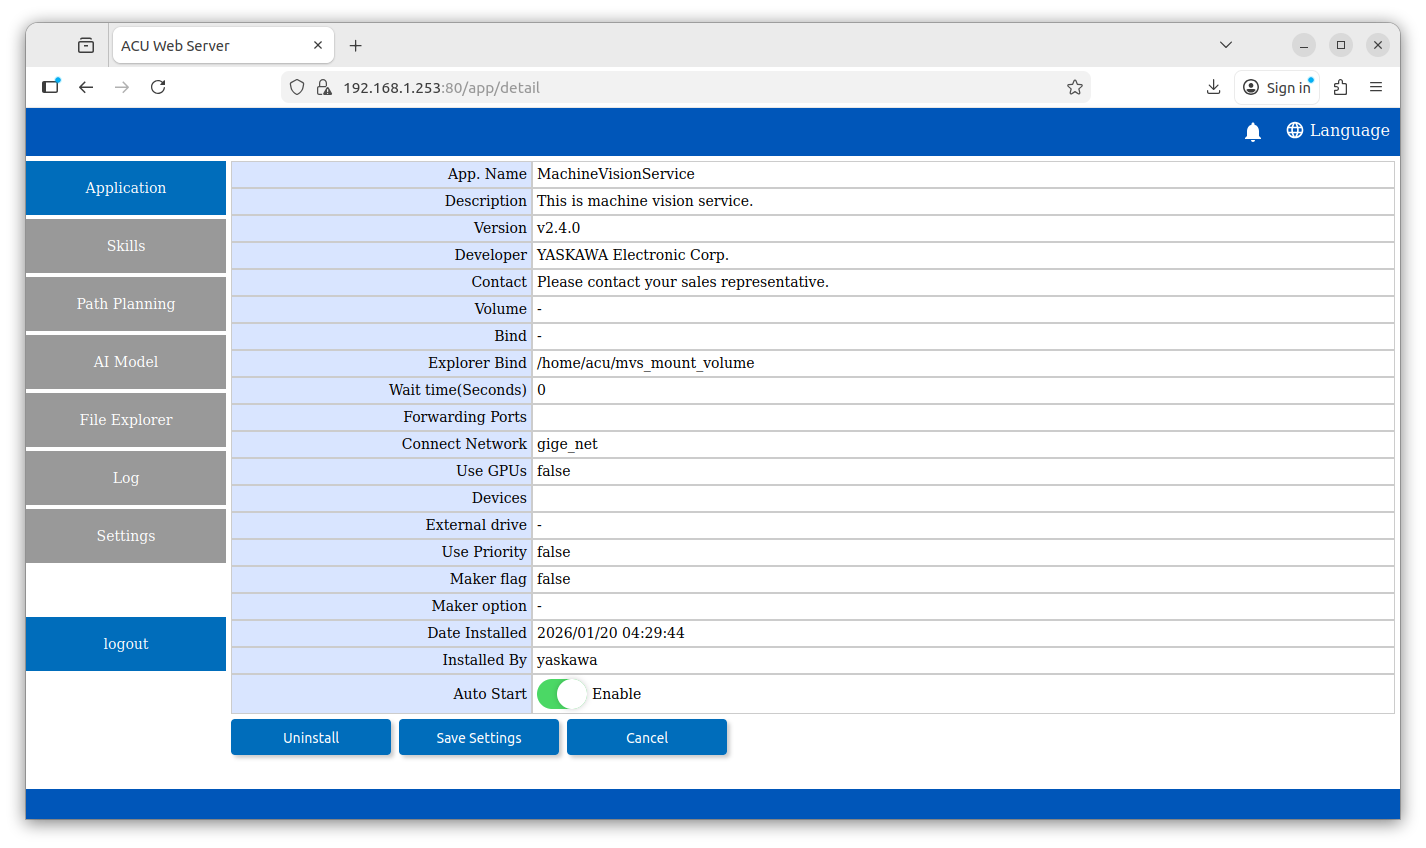
Figure 4.1: Application Detail and Configuration View
¶ 4. Module Configuration
These sections manage the intelligence and environmental awareness of the robot.
-
Skills:
Use the Skill Task Menu to Install specific robotic tasks or capabilities. -
AI Model:
View a list of uploaded models and their upload dates, or use the Add model button to upload new files. These models are uses in combination with the AI Service and Machine Vision Service -
Path Planning:
Manage environmental models for collision-free movement; use the Add project button to upload new environment data. Path planning models are generated using YNX Robot Simulator.
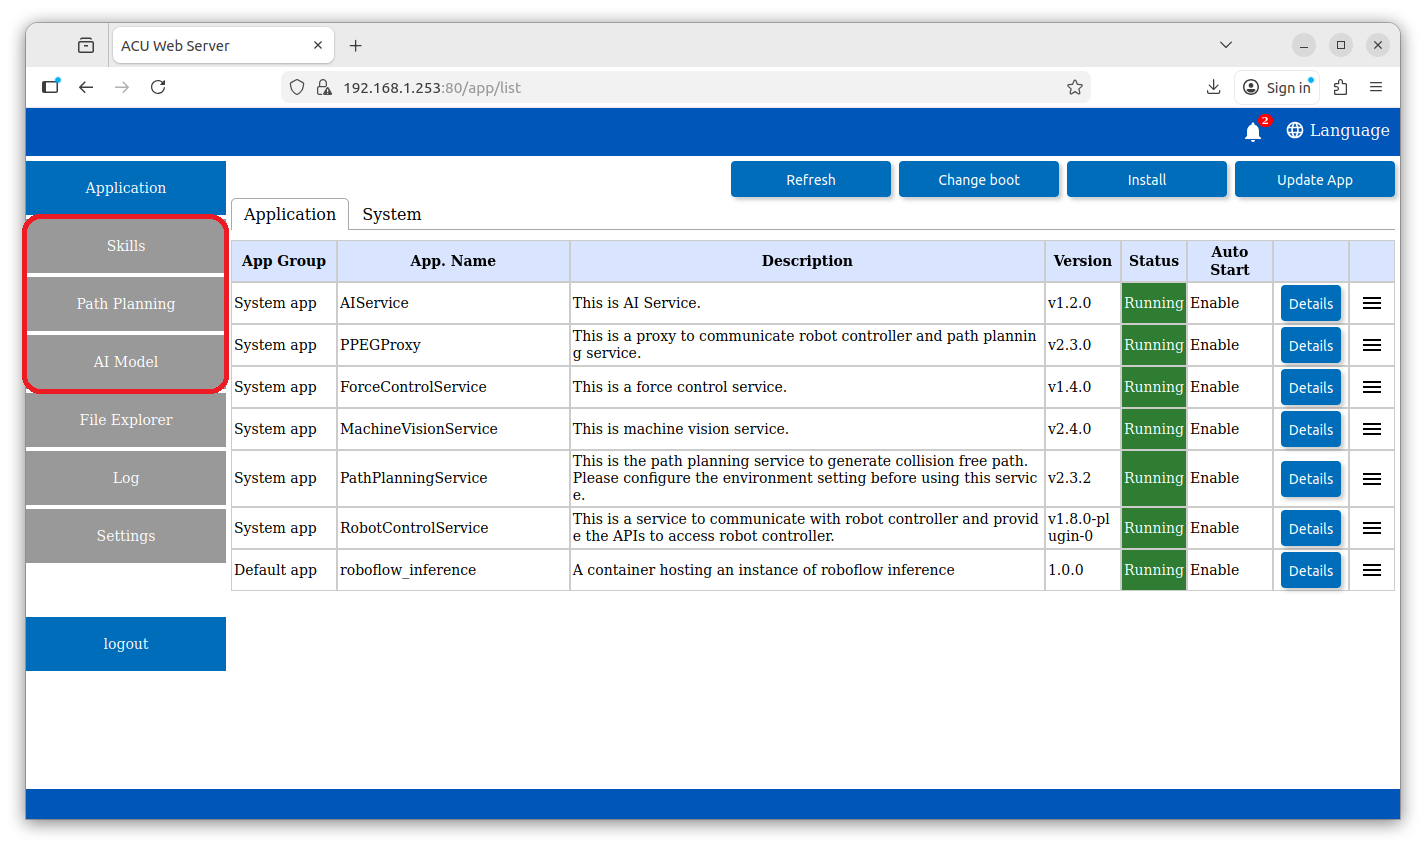
Figure 4.1: Module Configuration Menu
¶ 5. File Explorer
The File Explorer provides direct access to the directories bound to specific services.
¶ 5.1 Navigating and Managing Files
-
Service Selection:
Select a service (e.g.,MachineVisionService) to access its specific mount volume. -
File Actions:
Use the action bar to Upload file, Upload folder, or Create folder. -
Calibration Files:
Access subfolders likecaltabto manage specific calibration documents (These files are useful for printing calibration grids for MVS).
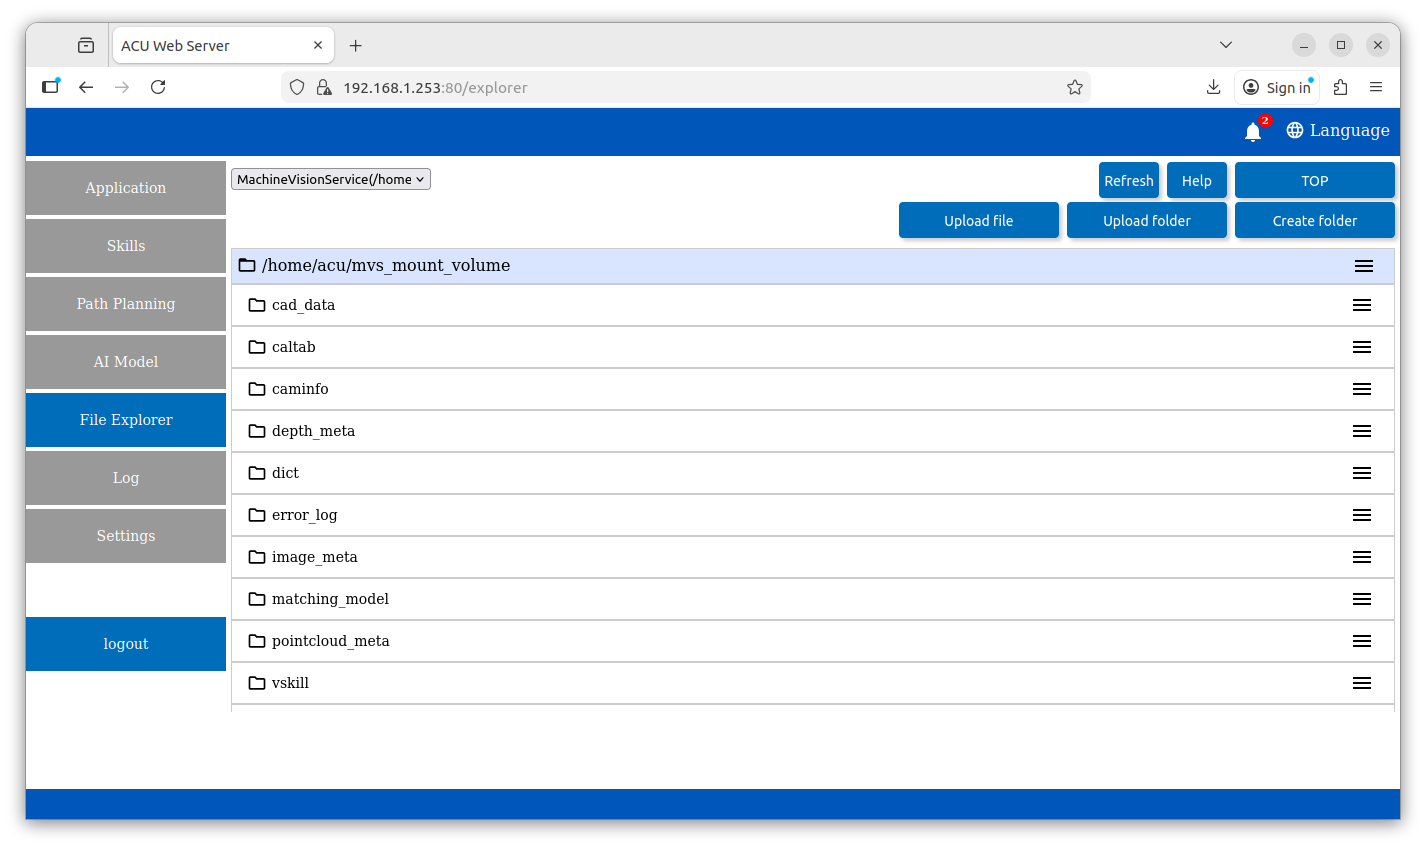
Figure 5.1: Service-specific File Explorer
¶ 6. System Monitoring (Log)
The Log module is critical for troubleshooting and verifying system performance.
-
Real-time Updates:
Toggle Automatically update to see logs stream in at a set frequency (e.g., every 5 seconds). -
Filtering:
Search by a specific App. Name or keyword Filter to isolate relevant entries. -
Data Export:
Click the CSV button to download the current log view for external analysis. -
Maintenance:
Use the Clear Log button to purge the current display.
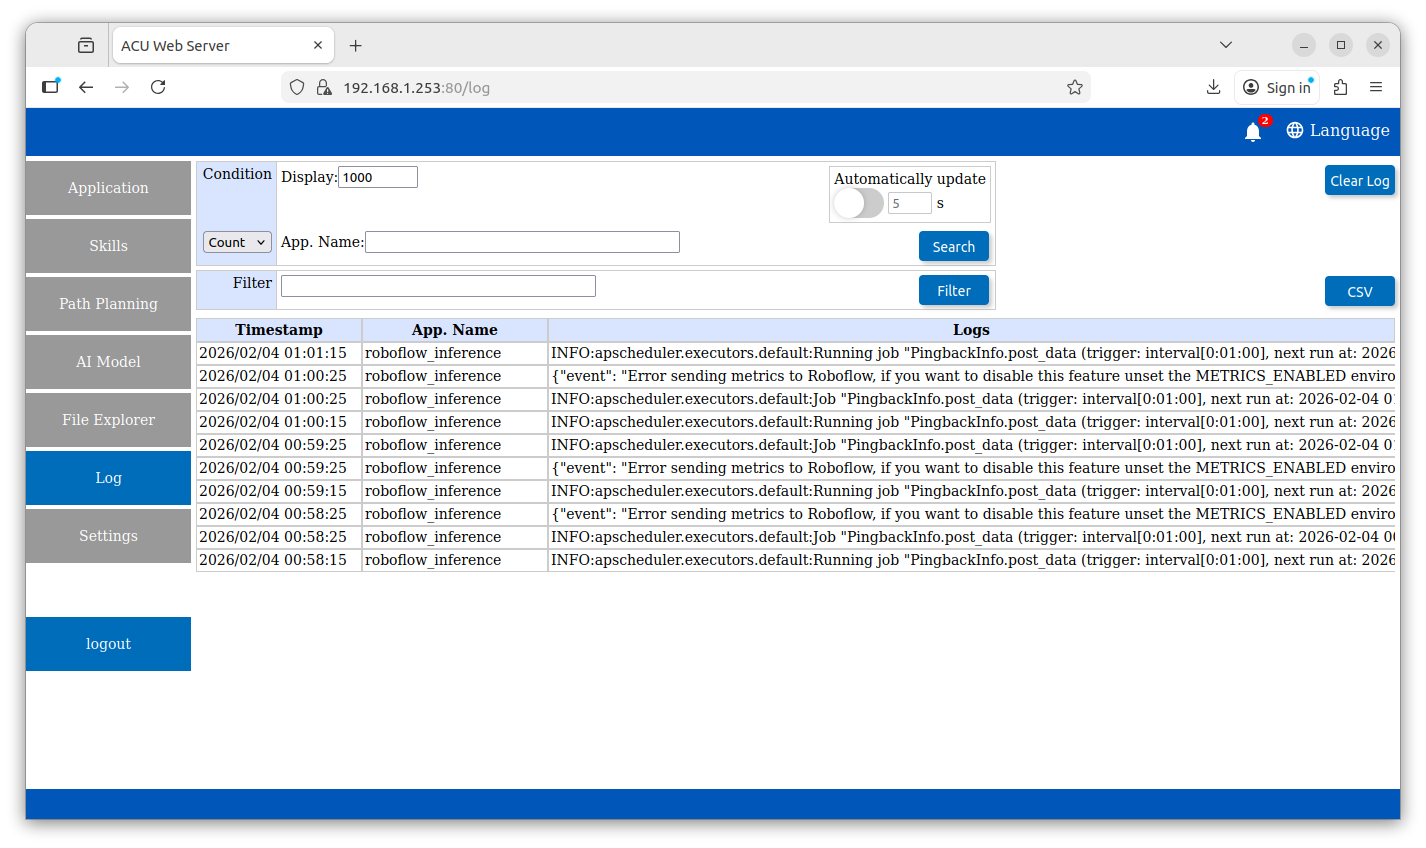
Figure 6.1: Real-time Log Monitoring
¶ 7. Global Settings
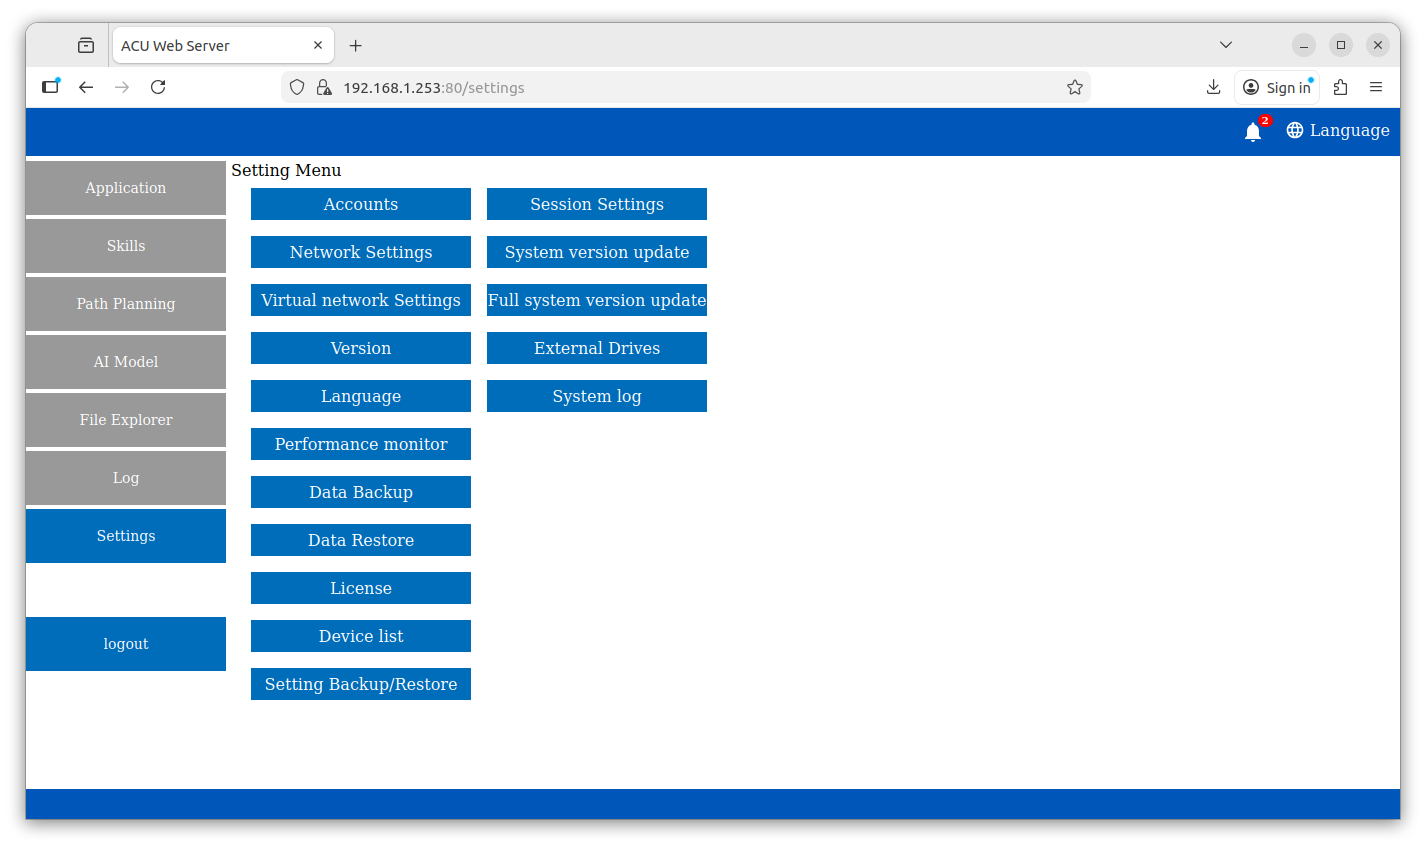
Figure 7.1: System settings panel
¶ 7.1 Accounts and Security
Security management is handled within the Server tab of the Settings module.
-
Create Account: Option to create new User and Developer accounts.
-
Password Management: The interface provides a secure utility to update credentials by requiring the New password, and a Confirm password entry.
¶ 7.2 Network Settings
The Network tab manages the unit's connectivity to the local area network (LAN).
- Interface Configuration: Users can manually define the IP address and Subnet mask for each network port.
- DHCP Configuration: Network ports can be setup to use DHCP to dynamically allocated the ACU's IP Address.
- Virtual Network Configuration: Users can create and set custom vlan settings to configure multiple virtual networks over a single network port.
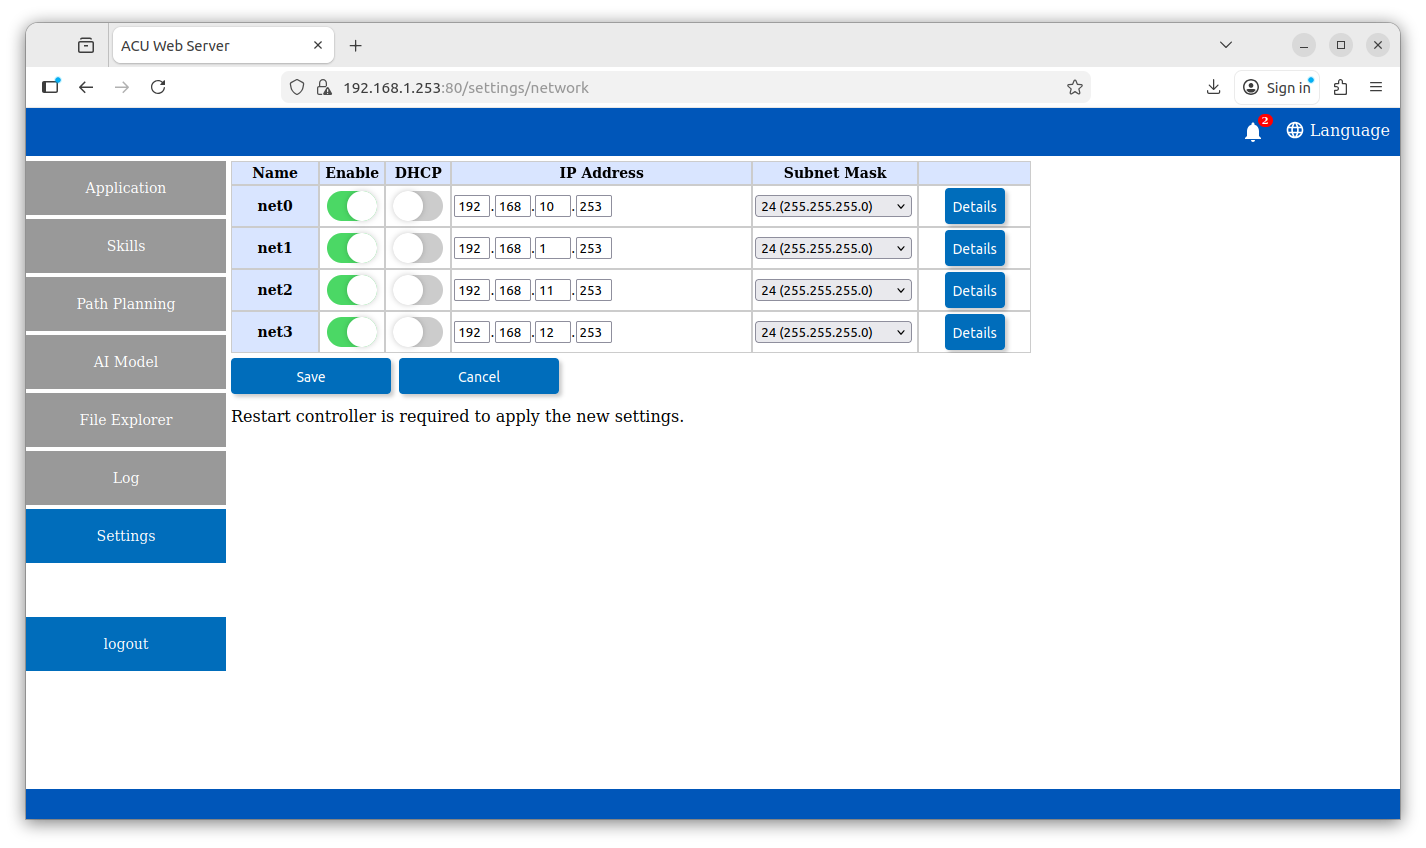
Figure 7.2: Network port settings
¶ 7.3 Version and Language
System localization and version information are centralized in the Server settings.
- Language Selection: Allows users to view the list of installed language packs.
- Version Information: Provides the version information for all the system level apps.
¶ 7.4 Performance Monitor
The system provides a real-time dashboard for hardware health and resource allocation.
- CPU Usage: Visualized through a gauge or percentage readout to monitor the processing load of the robot controller and AI services.
- Memory & Storage: Tracks RAM utilization and Disk space to ensure sufficient resources are available for log generation and file storage.
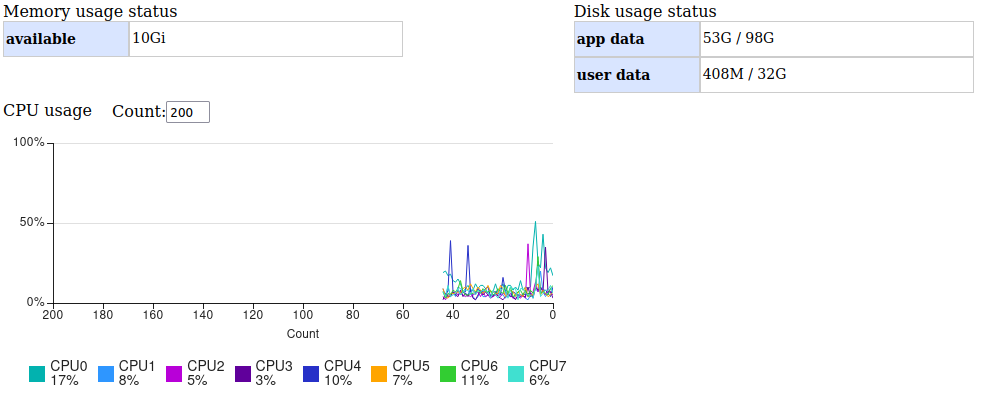
Figure 7.3: Performance monitoring tool
¶ 7.5 Data Backup & Restore
Tools for disaster recovery and system replication are found under the maintenance section. Backing up and restoring actions are performed through the use of a USB device connected to the ACU.
- Backup: Allows users to export the current system configuration and installed application data to a local file.
- Restore: Provides a utility to upload previously saved backup files to revert the system to a known stable state.
¶ 7.6 Session Settings
Allows the user to configure the session timeout period before the current user will automatically be logged out.
¶ 7.7 Version Updating
Connecting a USB device to the ACU will provide access to uploading version-up software. After acquiring the appropriate version-up software zip files, follow the associated instructions for how to properly upgrade ACU software.
¶ 7.8 External Drives
The External Drives settings panel allows users to mount and configure external hard drives for connection with user application service file systems.